|
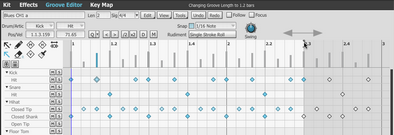
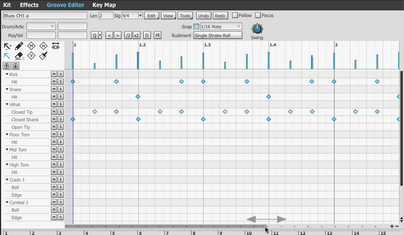
Click the Groove Editor button in the main BFD3 navigation bar to open the Groove Editor panel. This panel replaces any other controls in BFD3 with the exception of the Browser and the Global controls. BFD3's Groove Editor is an advanced, fully functional environment for recording, creating and editing events within Grooves. As well as the usual kinds of controls you'd expect for inserting, deleting, moving and copying events, the Editor also features specially designed tools for painting sequences of events in rhythmically meaningful ways. |
Using the Editor
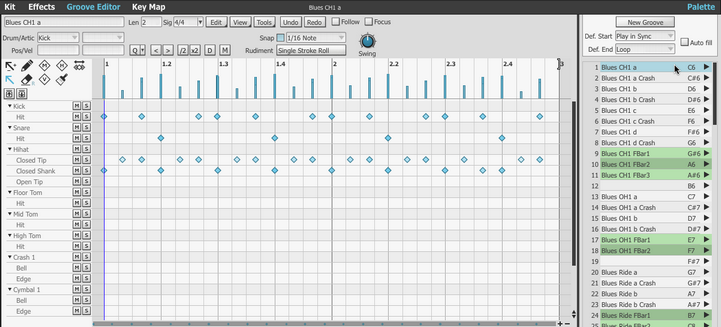
Click a Groove in the Palette to display its events in the Editor grid.
To start from scratch and create a new Groove, select a slot in the Palette and click the New Groove button, or right-click on a slot and use the New Groove function on the slot context menu that appears.
An empty 1-bar Groove is created and shown in the Editor grid.
Playing the currently edited Groove
When using the Editor, it can be useful to set the Auto-play mode to Palette (using the default Current sub-mode in the Preferences). This means that every time the BFD3 transport is started, the currently selected Groove, and therefore the Groove shown in the Editor, is played. To continuously repeat the Groove, set its End Action to Loop. For a guide to these settings, see the previous section.
It is crucial to be aware of the End Action settings - if the current Groove's End Action is set to play another Groove when it ends, then the next Groove plays while the previous Groove remains displayed in the Editor. If the Focus button is activated, the next Groove is shown in the Editor when it starts playing.
Editor Grid
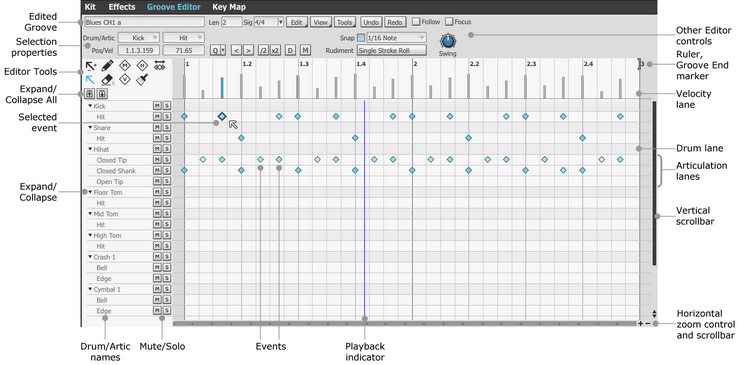
Edited Groove
This field displays the name of the currently edited Groove. The field can be clicked to enter a new name for the Groove.
Drum lanes
Each Drum slot features its own Drum lane in the editor. This lane shows all events for the Drum's articulations in the current Groove.
Events can be created and edited on the Drum lane, but any newly created events are inserted on the first articulation lane. To edit events with full control, you must use individual articulation lanes.
Note: Some Drum lanes may not be visible with certain View menu settings - see below.
Loading Drums from the Browser onto Groove editor lanes
If a Drum is currently selected in the mixer, its Drum lane is highlighted. Drums can be loaded into the kit within the Grooves page either via drag and drop from the Drum Browser to a Drum lane or by double-clicking a Drum to add it to the currently selected Drum slot.
Articulation lanes
To the left of the Drum lane is its Expand/Collapse button. Click the button to expand the kit-piece lane to show each articulation within it as a separate lane. Articulation lanes hold all events for the articulation in the current Groove. These lanes can be collapsed again by clicking the Expand/Collapse button.
Click the Expand/Collapse button to the left of the Drum lane to display a lane for each articulation within the Drum. These lanes show and allow you to edit events for each individual articulation.
The articulation lanes for a Drum can be collapsed by clicking the Drum's Expand/Collapse button again.
ALT-click any kit-piece's Expand/Collapse button to expand or collapse all kit-pieces' articulation lanes, or use the Expand All or Collapse All buttons.
Alternatively, activate the Auto collapse when expanding Event lanes option in the Editor's View menu. When this setting is active, expanding a Drum lane results in collapsing all other expanded Drum lanes.
Mute / Solo
Each Drum lane and all its individual articulation lanes feature Mute and Solo buttons. Mutes override Solos: if a Drum is muted, none of its articulations' events are heard, irrespective of their solo status. These buttons are not shown when using the Paint tool as the area of the interface is used for displaying the indicator for the secondary articulation - see the next section for details.
Events
Events are shown as 'diamonds' on each articulation lane that represent one-shot triggers - in other words, they represent the beginning of each event. There is no way of controlling the duration of events – triggered sounds play until they decay naturally.
The length of each event depends upon the triggered articulation itself and any damping and choke settings that may be active. A Drum's Choke articulation also stops any other articulations for the Drum that are playing.
•High velocity events are darker in colour than low velocity events.
•Selected events are shown with an outline.
•Muted events are shown as solid white: these do not produce any sound until they are unmuted again.
Ruler and Groove length
The Ruler at the top of the Editor grid shows a timeline in bars and beats. The end of the Groove is represented by the Groove End marker.
|
To change the length of a Groove, click and drag the Groove End marker left or right. The cursor changes to a horizontal arrow. Click and drag at the right edge of the Ruler to increase the Groove length beyond the current workspace. It may be necessary to decrease the current zoom level in order to set the desired length more easily. |
The Len (Length) parameter can also be edited directly to change the Groove's length - see below.
The Ruler can also be used for zooming and scrolling - see below.
Velocity lane
|
The Velocity lane underneath the Ruler shows event velocities as vertical stalks, with higher stalks denoting high velocity events, while lower velocity events are represented by shorter stalks. Draw across the velocity lane in order to 'paint' velocity changes. Hold down the ALT key to shape a series of event velocities with a straight line. |
If one or more events are selected, the velocity stalks of selected events are highlighted and using the above editing functions affects only the selection.
The Velocity tool can also be used for adjusting event velocities - see the next section.
Selection properties
|
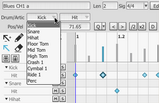
The Selection properties area displays and allows you to directly edit a number of properties for the currently selected event(s). The Drum/Artic controls show the Drum and Articulation triggered by the currently selected event. Click the drop-down menus in order to move the event to any other Drum/Articulation. The Pos/Vel controls show the Position and Velocity of the selected event. Click each value to type a new value. |
|
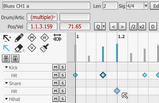
If multiple events are selected, the Drum control displays (multiple) - the events can still be moved to a new Drum using the drop-down menu. Even if the selection involves multiple articulations from multiple Drums, all events are moved to the same Drum, with articulations matched if possible. The Pos/Vel controls display values for the primary selection - by default, it is the first selected event, but clicking any event that is part of a multiple selection results in it becoming the primary selection. |
Entering a new Pos value adjusts the Pos value for all selected events relative to the primary selected event. The primary selected event is moved to the newly-specified position with all other selected events moved by the same amount.
Entering a new Vel value results in setting the velocity of all events to this value.
Editor Tools
This set of tools provides features for manipulating events directly on the editor grid using click and drag processes. See the next section for a full guide to using these tools.
Zoom and scrollbar controls
|
The Zoom in/out buttons at the bottom-right of the Editor grid control the horizontal zoom level. If the Zoom level results in part of the Groove not being visible in the Editor grid, use the Horizontal scrollbar to change the visible area. If there are too many kit-pieces or articulations to be visible at once, use the Vertical scrollbar to change the visible area. You can also use the mousewheel to scroll up and down in the Editor grid. Hold down ALT while using the mousewheel in order to zoom in and out. |
The Ruler can also be used for zooming and scrolling by clicking and dragging:
Click and drag down/up to zoom in/out.
Click and drag left/right to scroll when zoomed in.
The orientation of the zooming and scrolling can be altered in the Preferences, using the Invert Ruler Zoom Y and Invert Ruler Drag X settings.
Other Editor controls
|
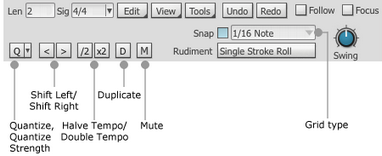
Len (Length) The Len setting specifies the length of the Groove in bars and beats of the current Sig (time signature). Click this value and enter a new numerical value in the form of bars.beats in order to change the length of the Groove. Groove length can also be altered by clicking and dragging the Groove End marker in the Ruler. |
Sig (Time Signature)
This control sets the time signature of the Groove - click the field to type a new value or use the drop-down menu.
Follow
When zoomed into a Groove so that only part of it is visible, enabling the Follow function causes the display to scroll and follow the playback position indicator. This function also affects the Drum Track.
Focus
By default, the Editor shows the currently selected Groove. With the Focus button enabled, the Editor always shows the currently playing Groove instead.
This means that if, for instance, a Groove's Slot End Action setting results in a transition to another Groove, the new Groove is shown in the Editor when the transition takes place.
With this button disabled, the Editor only ever shows the currently selected Groove.
|
Snap If this function is activated, event drawing and moving operations are snapped to the currently selected grid resolution and to other events in the Groove. With the Show Snap hints function activated in the View menu, a dotted line indicates which other event in the Groove is being used as the snap reference. |
Grid Type
This drop-down menu sets the grid resolution for quantizing and snapping. Straight, triplet and dotted note grid resolutions are available.
Swing (Grid Swing)
If a straight grid type is chosen, the Swing control moves every off-beat grid division so that events can be entered at or moved/copied to swung positions when the Snap function is enabled or when the Quantize function is used.
Rudiment
This function is used in conjunction with the Paint tool - see the next section for details.
Quantize
Clicking this button causes every selected event to be quantized towards the nearest grid division, the extent of which is dictated by the Quantize strength setting. The Groove FX section allows non-destructive quantizing.
Quantize strength
This control sets the amount of Quantize that is applied. At 100%, events are fully quantized while at lower values, events are quantized proportionally between the original and ideal quantize position.
Shift Left
Click this button to move every selected event left (earlier in the Groove) by one grid division. Any event moved past the start of the Groove cycles round to the end.
Shift Right
Click this button to move every selected event right (later in the Groove) by one grid division. Any event moved past the end of the Groove cycles round to the start.
/2 (Halve Tempo)
x2 (Double Tempo)
With no events selected, these functions halve or double the tempo between the Groove's events (in other words, the time between them is doubled or halved). With a selection of events, this process is applied only to the selection.
If necessary, the Groove's length is increased to accommodate the new position of the affected events.
The Groove FX section features non-destructive versions of these functions.
Duplicate
With no events selected, clicking the Duplicate button doubles the length of the current Groove and duplicates its contents to fill this extra period.
With a selection of events, the events are duplicated from the start of the next grid division. The length of the Groove is increased if necessary.
Mute
Activating the Mute button results in muting the selected event(s). This function can also be achieved using the Mute tool.
Edit menu
|
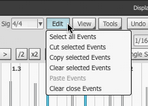
The Edit menu provides several selection and editing functions. It is also possible to perform these operations using keyboard shortcuts although many hosts do not allow all keyboard events to get through to BFD3. As well as commands to Cut, Copy, Clear and Paste selected events, there is also a function to Select all events in the current Groove. When using the Paste events function with multiple events, the same rules apply as when using the Selection properties controls (see above). |
An additional function, Clear close Events, is useful when editing performances recorded from MIDI controller hardware prone to double-triggering - electronic drumkits are often susceptible to this problem. The function removes unnecessary notes which are positioned very close together - higher velocity notes are prioritized and weaker velocity notes are cleared.
View menu
|
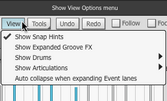
The View menu features a number of settings to customize various aspects of the Editor grid. Show Snap Hints As mentioned earlier in this section, the Show Snap Hints function, when activated, displays indicators to show when other Groove events are used as a snap reference. |
Show expanded Groove FX
This function is discussed in the Groove FX section later in this chapter.
|
Show Drums These sub-menus allow you to customize which Drums and articulations appear as lanes in the Editor grid. The Drums used in Groove and Artics used in Groove settings result in the fewest possible lanes, although to draw events for an unused Drum or articulation requires you to change to the Loaded Drums only or All settings. |
The Default settings for each function are a factory-specified set of lanes.
Auto collapse when expanding Event lanes
When this setting is activated, expanding a Drum's Event lane results in collapsing all other Drum lanes that may be currently expanded.
Tools menu
|
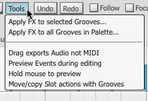
Apply FX to selected Grooves These functions are related to the Groove FX section. Drag exports Audio not MIDI This function relates to exporting Grooves. |
Preview events during editing
With this setting enabled, events are heard when being edited in the Groove editor. This occurs during the following operations:
• drawing an event
• selecting an event
• moving an event to a different articulation lane
• changing an event's velocity
Hold mouse button to preview
This setting is identical to that in the Grooves Browser Options menu and is discussed in the previous section.
Move/copy Slot actions with Grooves
This function is discussed in the previous section.
Keyboard shortcuts
Many Groove Editor functions can be assigned to keyboard shortcuts using the GUI Preferences.
