Overview
|
BFD3 allows you to import mono or stereo .WAV files to create single-articulation Drums, which can have multiple velocity layers. The following caveats apply with the Sample Import function: •There can be only 1 articulation in the imported Drum. It can be either one amplitude-scaled sample, or multiple velocity layers. •Imported Drums only produce sound in the direct bus. There is no facility for multiple microphones or ambience channels. It is possible to add space to imported sounds by using BFD3's reverb effects. •Only 1 channel is active for the imported Drum in the mixer, regardless of which Kit-Piece slot is used, unless it is loaded into the kick1 or snare1 slots. •Samples can be mono or stereo, but you cannot use a combination of mono and stereo samples in the same imported Drum. |
Sample Import panel
|
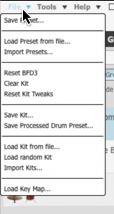
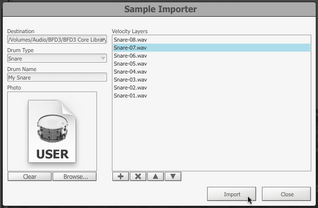
In order to create a Drum from a set of one or more samples, you must open the Sample Import panel using the Import samples... function in the Drum Browser Options menu. Import settings Destination Select a Content Location to which to save the imported samples as a Drum. Imported sounds stream in the same way as other sounds in BFD3, so the path must be one of the locations set up in the BFD3 Content Locations panel. |
If you receive an error when importing samples, make sure that you have adequate permissions to write to the location, and try again.
Drum Type
|
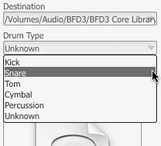
Choose the Drum type (Class) from this drop-down menu. The Drum can be classified as a Kick, Snare, Tom, Cymbal or Percussion Drum. Hihats are not an available option because they would require more than one articulation. If you require imported hihats, create separate Drums for open and closed samples with a Percussion classification. Load each of these into Percussion slots, then use the Key Map page to layer the relevant hihat articulations with those of the imported Drums. It is advised to save the session as a Preset in order to use it again in future if required. |
Drum Name
Type a name for the created Drum. This is the name which is visible in the Drum Browser.
Photo settings
Any JPEG, PNG or TGA image file can be specified as a photo to associate with the imported Drum. If none is specified, a default image is used.
Browse button
Clicking the Browse button opens a system file open dialog allowing you to browse to a JPEG, PNG or TGA file to specify for the imported Drum. The file must have a resolution of 180x150 pixels.
Clear button
Clicking this button removes the photo currently specified for the imported Drum.
Velocity layer settings
This section lets you add samples, and sort them into the desired order, from the lowest velocity layer at the top of the list, to the highest layer at the bottom.
|
Add Layer(s) Click this button to add a sample. Any mono or stereo WAV file can be selected, but it must be at a sample rate of 44.1kHz, at a bit depth of either 16 or 24 bit. If only one sample is specified, BFD3 automatically scales the amplitude of the imported Drum with incoming Groove/MIDI event velocity. If 2 or more samples are specified, they are split proportionally across the velocity range. Any additional mplitude scaling must be applied manually with the Range control after the Drum has been loaded. |
Remove Layer(s)
With a sample selected, click this button to remove the sample from the list of velocity layers.
Move layer up
Click this button to move the selected sample up the list of velocity layers: it changes places with the sample immediately above it.
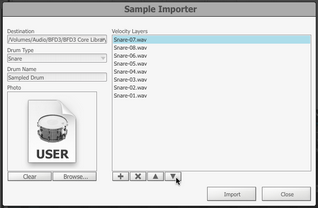
Move layer down
Click this button to move the selected sample down the list of velocity layers: it changes places with the sample immediately below it.
Import & Cancel
Click the Import button to import the Drum with the current settings - it is saved to the content location specified and added to the current database, so once the Import operation is complete, it is now available to use from the Drum Browser (it is not loaded automatically to the current session).
If you change your mind and decide that you don’t want to import a Drum at this time, click the Cancel button.


